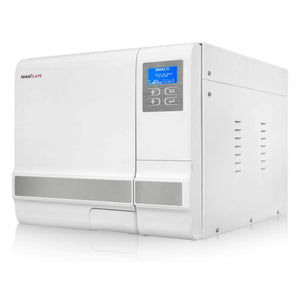
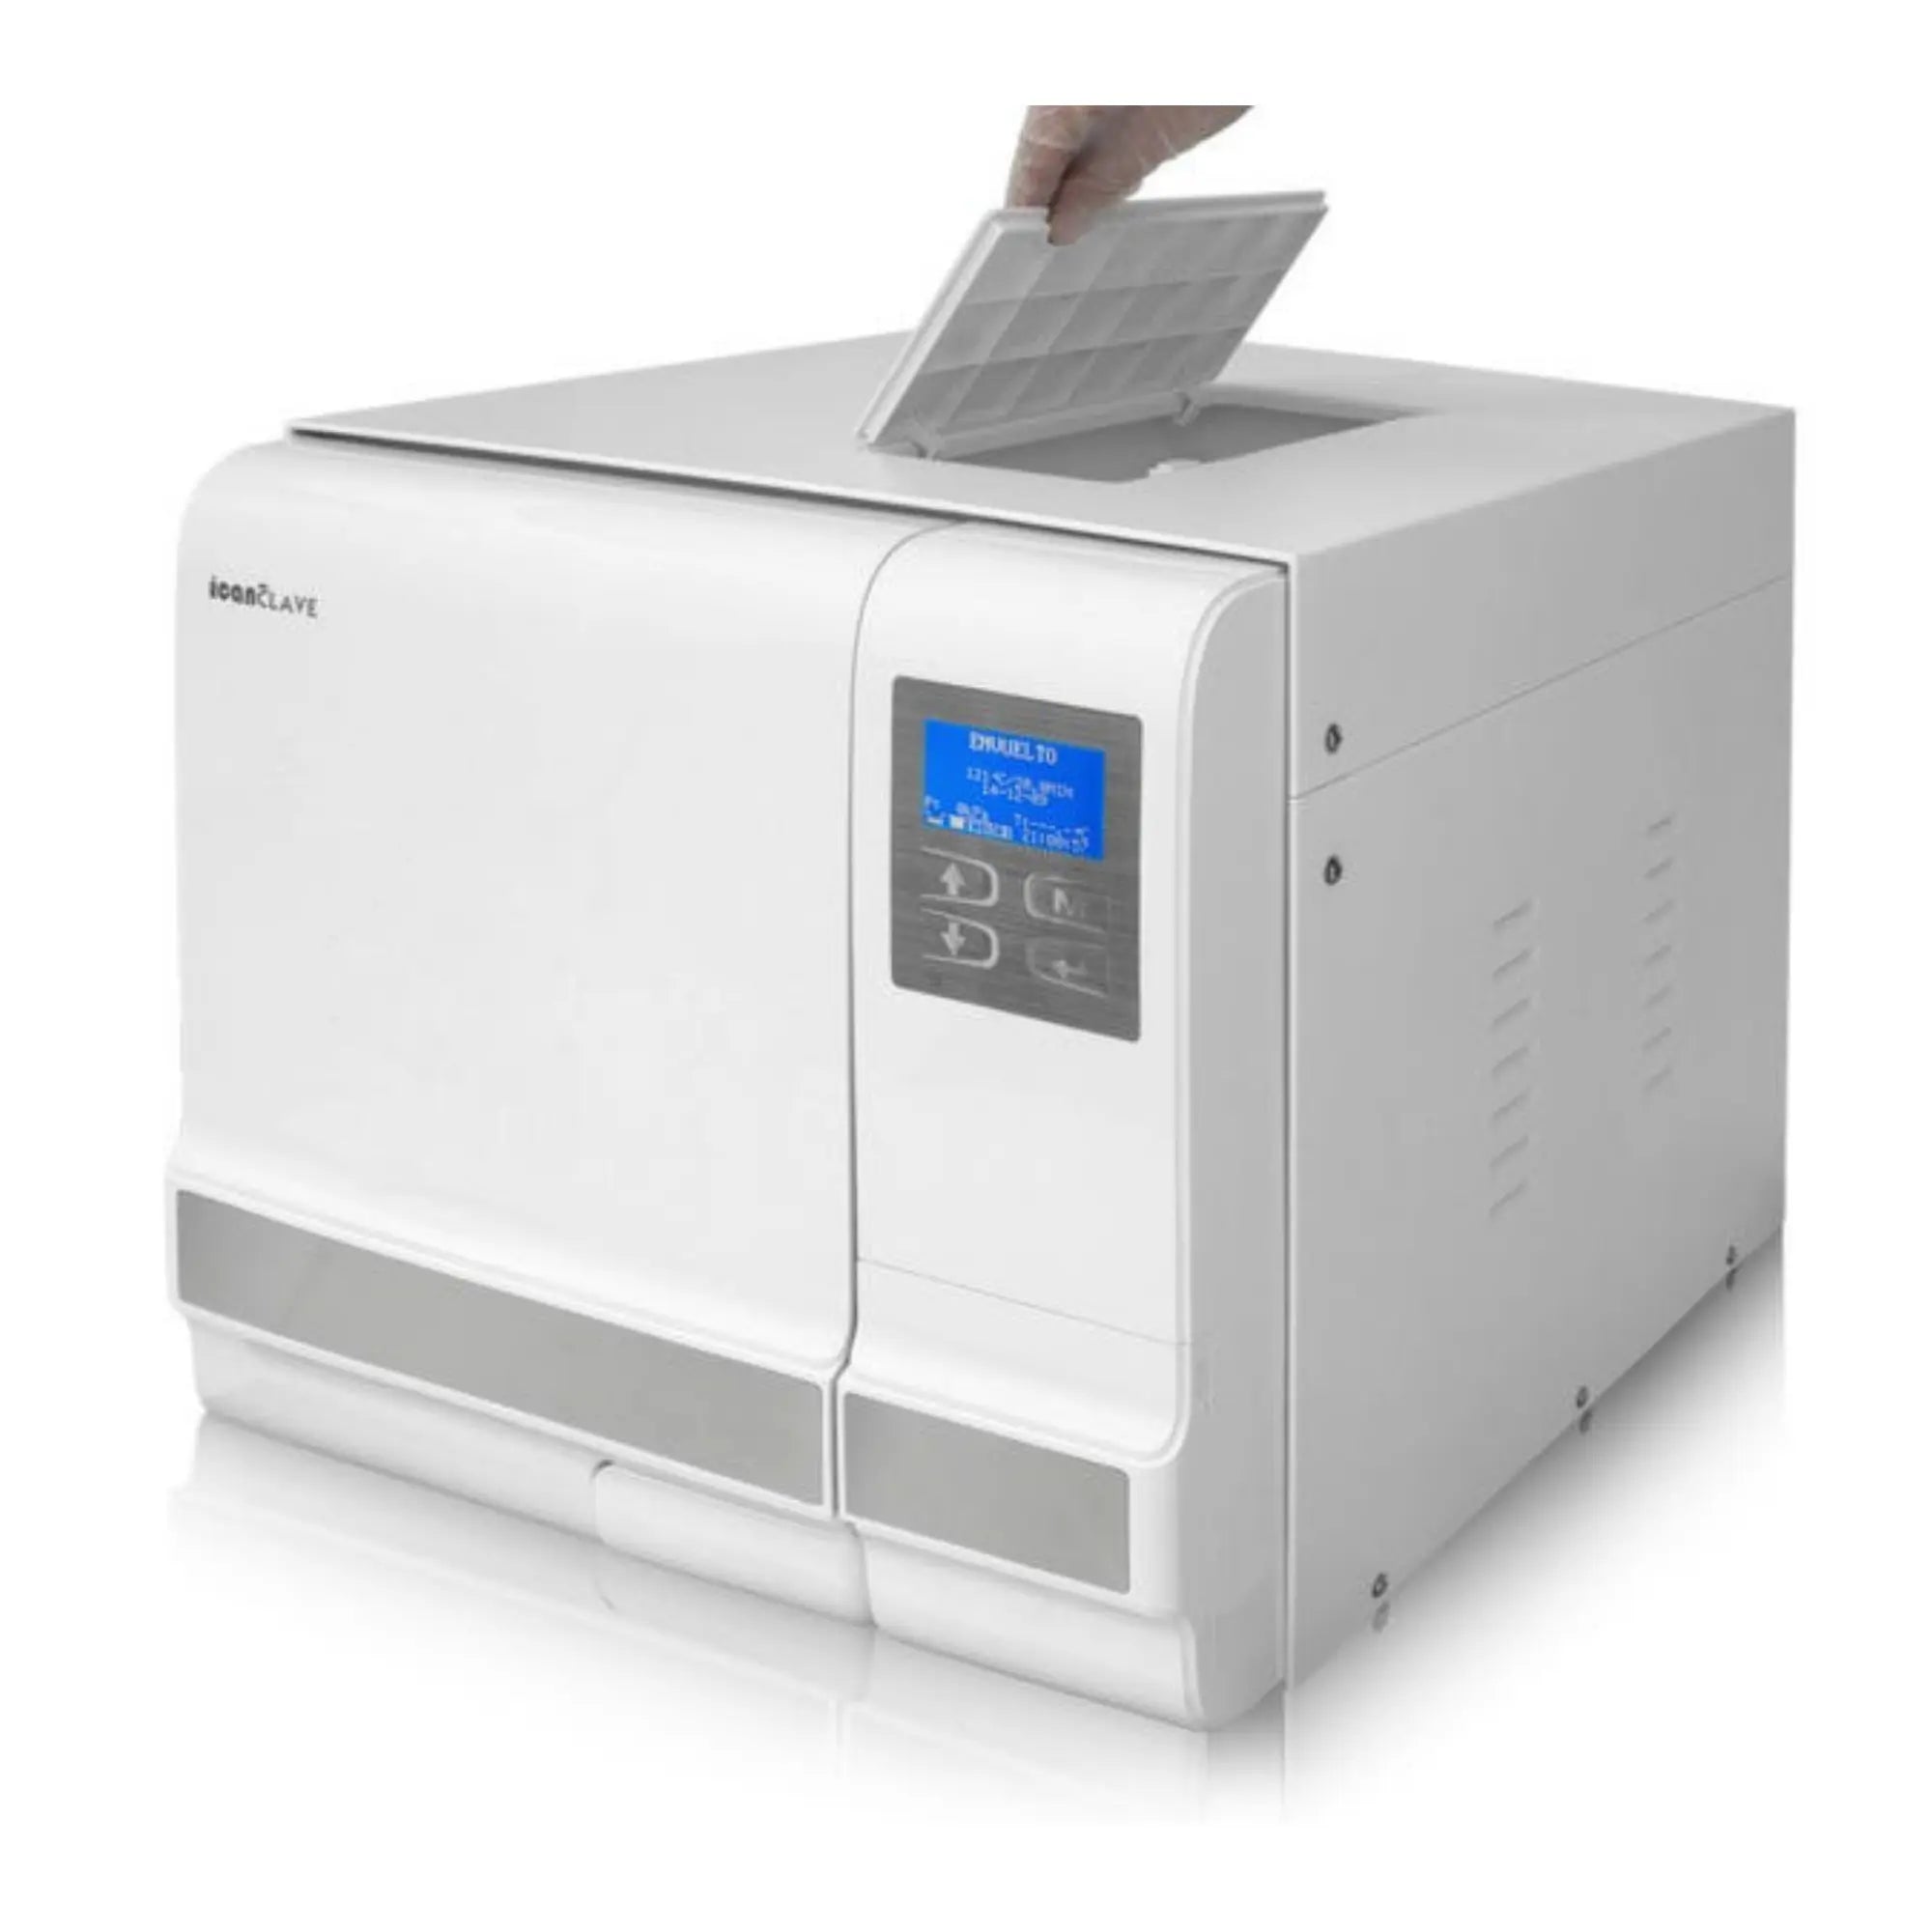
White 12-liter Class B Autoclave with USB
Warranty details
Safety
- The cycle does not start if the door is not properly closed.
- The automated double hydraulic interlocking safety device prevents the door from opening while the chamber is under pressure.
- Safety valves prevent pressure generator and camera.
- A safety thermostat prevents overheating in the chamber and generator
- An automatic safety lock prevents accidental opening of the door during the sterilization process protector automatically cuts off electric power if there is a short circuit or the power supply is not very stable.
- Failure alarm indicates a failed cycle and a detailed error code.
- Door alarm indicates that the door is not secured.
- Low water alarm indicates when the water tank is empty or overfilled.
Technical Specifications
- Voltage: 220-240 VAC; 50/60 Hz; 10A
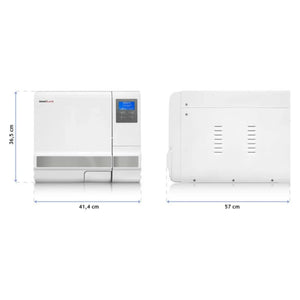
- Chamber dimensions: 200 x 360 mm
- Tray size: 156 x 295 mm
- Circuit breaker: F16A / 400V
- 2000W
- Rated power: 1500 VA
- Sterilization temperature: 121 ° C / 134 ° C
- Distilled water tank capacity: 2.5 L
- Operating temperature: 5 ° C / 40
- Relative humidity: Max. 80%, non-condensing
- External dimensions: 420 x 370 x 595 mm
- Net weight: 40 kg
- Maximum noise level: <70 dB
- Atmospheric pressure of 76 kPa / 106 kPa
Maintenance and error message guide for your sterilizer
Icanclave Autoclave: maintenance and error message guide
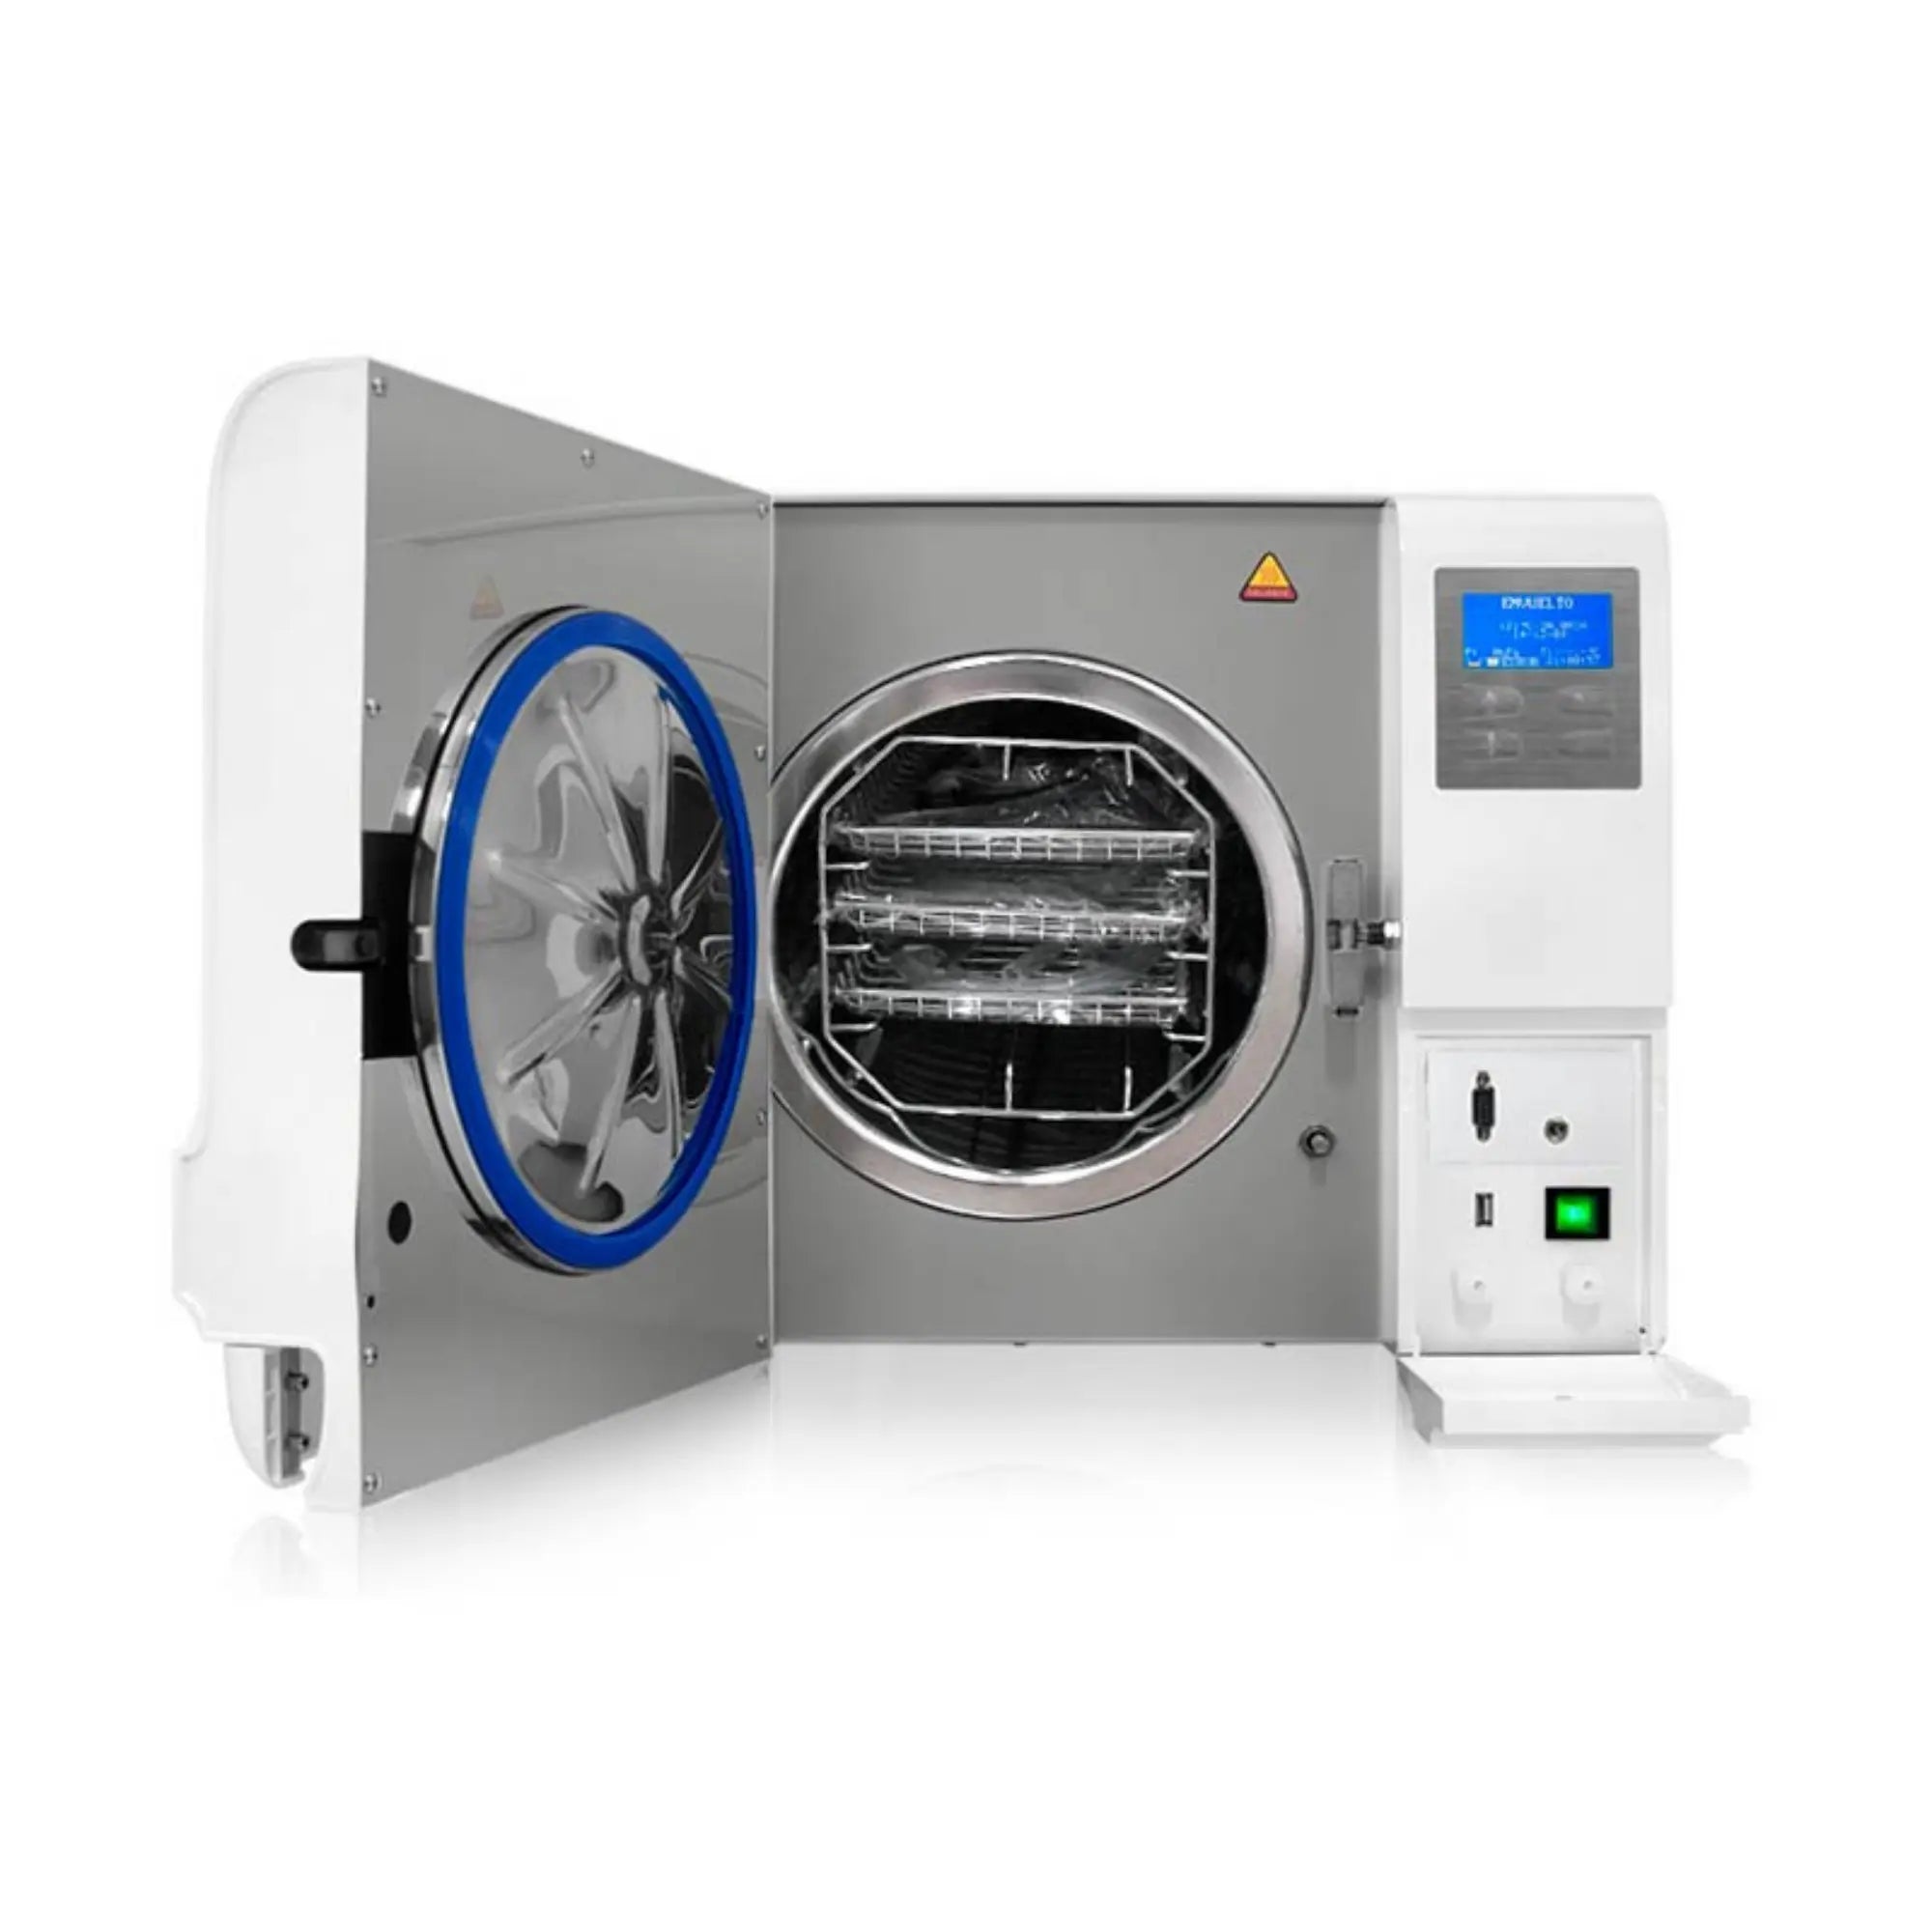
Components
- Distilled water tank
- LCD screen
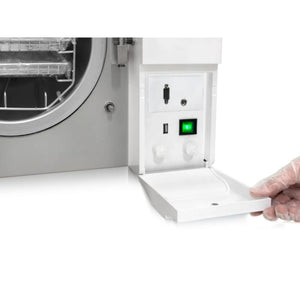
- Control panel
- Main switch
- Key for draining distilled and used water
- USB port
- Safety valve
- Ventilation grille
- Locking system
- Power cable
- Label
Included accessories
- Sterilizer
- USB
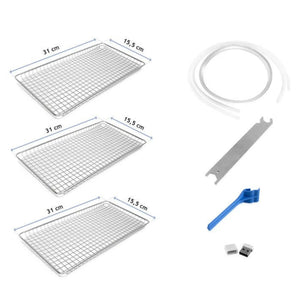
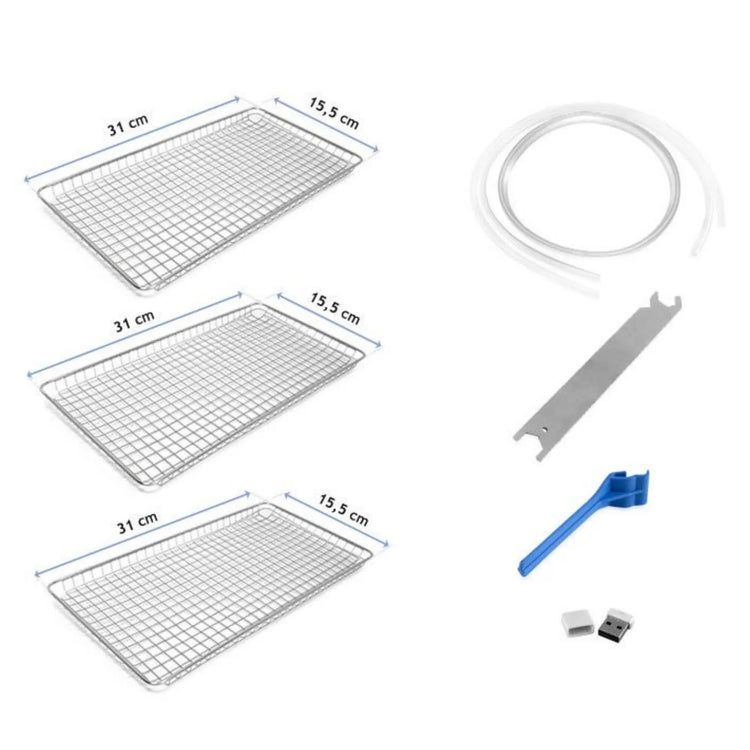
- 3 instrument trays
- Tray support
- Handle for tray extraction
- Tool to adjust the door
- 2 drainage hoses
- Door seal
- Instruction manual
Regulations
- 93/42 / EEC Medical Devices Directive.
- 97/23 / EEC Pressure Equipment Directive.
- EN 13060 Small steam sterilizers.
- EN 61326, EN 61000 EMC.
- EN 61010-1, UL 61010-1 safety requirements.
- EN 61010-2-040, IEC 61010-2-040 Specific requirements for steam sterilizers used for the treatment of medical materials.
Autoclave step-by-step process
1. Open the door, take out the tools and accessories located in the sterilization chamber, remove the packaging, and clean them.
2. Plug the power cord into a suitable power source.
3. Connect the printer (sold separately).
4. Powering on: the main switch is located on the front, bottom right of the device. Once switched on, the LCD screen will light up, and the basic operating symbols of the autoclave, such as door position, water level, sterilization program, date, and time will illuminate.
5. Remove the top cover then fill the distilled water tank. If a beeping sound occurs, it means you have exceeded the allowed water level in the tank. Drain the excess water until the alarm stops.
6. Preparation of materials for sterilization: place the instruments on the different trays, and separate them according to their materials. If the instruments are not made of stainless steel, use sterilization pouches. These should not be in contact. Check that all instruments are properly placed, so that no water remains in hollow parts. Do not overload the instrument trays and do not place them in direct contact with the walls of the sterilization chamber. Do not use paper clips or needles to avoid any damage or malfunction of the autoclave.
7. Select the sterilization program.
8. Start the sterilization cycle.
After selecting the sterilization program, place the instruments on the trays in the chamber using the supplied plastic clamp.
Once the instruments are properly placed inside, close the door. Caution: make sure the door is closed properly, otherwise the autoclave will not operate.
9. Start the sterilization program.
Press the power button, the autoclave will start operating for about 30-75 minutes.
10. End of sterilization cycle.
Once the sterilization cycle is complete, the printer (not included) will automatically print the complete cycle report.
Once the pressure has dropped to 0, you can open the door and remove the instruments. The autoclave will alert you with a beeping sound once the sterilization cycle is complete.
Caution: Use the plastic clamp to remove the instruments.
IMPORTANT: Do not reuse wastewater after draining the tank.
It is important to keep the packaging carton in case of after-sales service.
It is important to keep the packaging carton in case of after-sales service.